
# 用VuePress 搭建的个人网站
# 快速上手
- 创建并进入新目录
mkdir vuepress-notes
cd vuepress-notes
# 或者
mkdir vuepress-notes && cd vuepress-notes
2
3
4
- 初始化 npm
npm init
- 安装 VuePress
我们已经不再推荐全局安装 VuePress
npm install -D vuepress
- 在根目录下创建 docs 文件夹
mkdir docs
#可以用命令 也可以直接在编辑器中添加docs
2
在 docs 目录下新建 README.md 文档,并写入一些内容
在
package.json文件添加scripts
{
  "scripts": {
    "dev": "vuepress dev docs",
    "build": "vuepress build docs"
  }
}
2
3
4
5
6
- 启动本地服务器
npm run dev
- 浏览器打开服务器所给地址 VuePress 会在 http://localhost:8080 (opens new window) (opens new window)启动一个热重载的开发服务器
# 目录结构
以下为 vuepress-notes 部分目录结构,比较重要的是 .vuepress 目录的结构。
官方目录结构请移步(会有详细介绍) 这里→ (opens new window)
.
├── docs
│   ├── .vuepress
│   │   ├── public
|   |   |   └── img
│   │   ├── styles
│   │   │   └── index.styl
│   │   ├── nav.js
│   │   ├── sidebar.js
│   │   └── config.js
|   |
│   ├── notes
│   │   ├── vue
|   │   │   ├── images
|   │   │   ├── sidebar.js
|   │   │   ├── vuex.md
|   │   │   ├── vue3.md
|   │   │   └── ...
|   |   |
|   |   ├── nodejs
|   │   │   ├── images
|   │   │   ├── sidebar.js
|   │   │   ├── node.md
|   │   │   └── ...
|   │   │
|   │   ├── ...
|   |   |
│   │   └── ...
|   |
│   └── README.md
│
├── .gitignore
|
└── package.json
# 文件配置.vuepress/config.js
具体什么意思 代码中有写注释
官方参考文档:配置 (opens new window)、插件 (opens new window)、主题 (opens new window)
module.exports = {
    // 插件:置顶按钮、图片缩放、进度条
    plugins: ['@vuepress/back-to-top', '@vuepress/medium-zoom', '@vuepress/nprogress'],
    // 自定义网站 favicon
    head: [['link', { rel: 'icon', href: '/img/logo.jpg' }]],
    // 根路径,和仓库名一致
    base: '/vuepress-notes/',
    // 网站的标题 左上角的标题
    title: 'shencailingNotes',
    description: 'Just playing around',
    // markdown 相关配置
    markdown: {
        // 代码块行号
        lineNumbers: true,
    },
    // 默认主题相关配置
    themeConfig: {
        // 配置左上角的 logo 导航栏 Logo
        logo: '/img/logo.jpg',
        // 导航栏 单独弄了js文件
        nav: require('./nav.js'),
        // 侧边栏 单独弄了js文件
        sidebar: require('./sidebar.js'),
        // sidebar: 'auto',
        // 标题深度,2 表示提取 h2 和 h3 标题
        sidebarDepth: 3,
        // 显示所有页面的标题链接
        // displayAllHeaders: true, // 默认值:false
        // 启用页面滚动效果
        smoothScroll: true,
        // 最后更新时间
        lastUpdated: 'Last Updated',
        // 默认值是 true 设置为 false 来禁用所有页面的 下一篇 链接
        nextLinks: true,
        // 默认值是 true 设置为 false 来禁用所有页面的 上一篇 链接
        prevLinks: true,
        // 导航栏显示 gitee 仓库
        repo: 'https://gitee.com/shen-cailing/vuepress-notes',
        repoLabel: 'Gitee',
    },
}
2
3
4
5
6
7
8
9
10
11
12
13
14
15
16
17
18
19
20
21
22
23
24
25
26
27
28
29
30
31
32
33
34
35
36
37
38
39
40
41
# 首页文档 docs/README.md
---
home: true
heroImage: /img/hero.png
heroText: shencailingBlog
tagline: 前端学习记录
actionText: 快速上手 vuepress →
actionLink: /notes/vuepress/vuepress
features:
- title: 前端基础学习
  details: HTML、CSS、javaScript
- title: 前端框架学习
  details: vue
- title: 其他
  details: 好用的工具(sass)、好用的组件(element ui)、
footer: ...
---
2
3
4
5
6
7
8
9
10
11
12
13
14
15
16
# 导航栏 .vuepress/nav.js
我没有像官方文档一样 将 导航栏的配置都写在 config.js 中.
而是提取成一个导航栏单独的模块nav.js.
避免config.js文件的臃肿,也有利于后期的维护.
注意事项:
- 所有路径以
/开头,/代表 docs 目录 - 若没有指明具体文件,只有文件夹,则默认会寻找该文件夹下的 READMED.md 文档,如
'/notes/'→'/notes/README.md'
// .vuepress/nav.js
module.exports = [
  {
    text: '组件/工具/参考',
    link: '/resources/referenceWebsite/zuJian_website'
  },
  {
    text: '前端学习',
    items: [
      {
        text: '基础',
        items: [
          { text: 'HTML&CSS', link: '/notes/h5c3/h5c3' },
          { text: 'Javascript', link: '/notes/js/js基础' },
          { text: 'Sass', link: '/notes/sass/sass' },
        ]
      },
      {
        text: '框架',
        items: [
          { text: 'Vue', link: '/notes/vue/vue基础' },
        ]
      },
      {
        text: '其它',
        items: [
          { text: 'Git', link: '/notes/git/git' },
          { text: 'Nodejs', link: '/notes/nodejs/node' },
        ]
      }
    ]
  },
]
2
3
4
5
6
7
8
9
10
11
12
13
14
15
16
17
18
19
20
21
22
23
24
25
26
27
28
29
30
31
32
33
然后可以看文件配置这个模块中 themeConfig->nav 导入使用
具体实现效果:
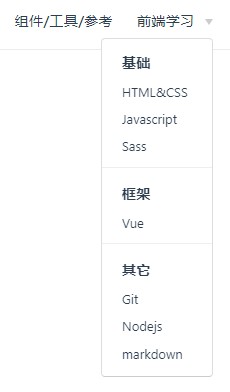
# 侧边栏 .vuepress/sidebar.js
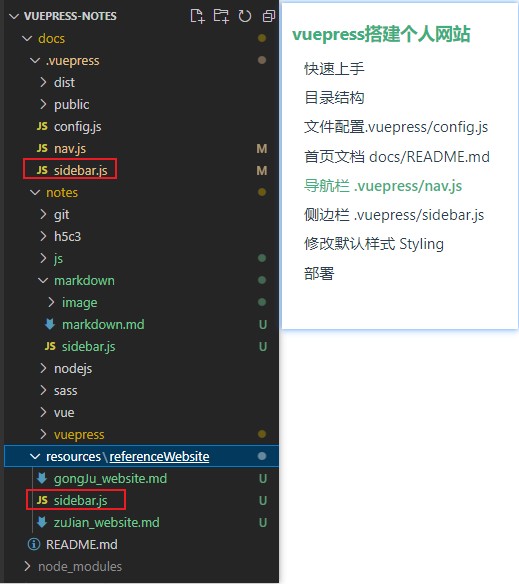
vuepress-notes 为不同页面显示不同的侧边栏,并且每个页面的侧边栏封装为一个模块便于后续维护。
以 Vue 页面的侧边栏为例:
// .vuepress/sidebar.js
module.exports = {
    '/notes/vuepress': require('../notes/vuepress/sidebar'),
    '/notes/h5c3': require('../notes/h5c3/sidebar'),
    '/notes/js': require('../notes/js/sidebar'),
    '/notes/sass': require('../notes/sass/sidebar'),
    '/notes/vue': require('../notes/vue/sidebar'),
    '/notes/git': require('../notes/git/sidebar'),
    '/notes/nodejs': require('../notes/nodejs/sidebar'),
    '/notes/markdown': require('../notes/markdown/sidebar'),
    '/resources/referenceWebsite': require('../resources/referenceWebsite/sidebar'),
}
2
3
4
5
6
7
8
9
10
11
12
// notes/vuepress/sidebar.js
module.exports = [
  {
    title: 'vuepress搭建个人网站',
    path: '/notes/vuepress/vuepress'
  }
]
2
3
4
5
6
7
注意:,在添加一个页面的时候 这两个文件都是需要添加内容的 不要忘记
具体实现效果:
# 修改默认样式 Styling
自己暂时还没有使用上,可以自定义样式
在 .vuepress/styles/index.styl 文件
在 .vuepress/styles/palette.styl 文件
# 部署
打算部署在gitee上,暂时没有实名认证,到时候再部署
# 1.部署到github上 GitHub Pages
# 1.1部署的步骤
1.首先,自己已经配置好了 SSH 公钥了
2.新建一个项目 名字和config->base: '/vuepress-notes/'里面的一样
3.0官方有提供一个deploy.sh文件模板 可以快速部署 我放在docs同级目录下
运行D:\SCLziji\sclBlog\vuepress-notes> ./deploy.sh
# deploy.sh 文件
#!/usr/bin/env sh

# 确保脚本抛出遇到的错误
set -e

# 生成静态文件
npm run build

# 进入生成的文件夹
cd docs/.vuepress/dist

# 如果是发布到自定义域名
# echo 'www.example.com' > CNAME

git init
git add -A
git commit -m 'deploy'

# 如果发布到 https://<USERNAME>.github.io
# git push -f git@github.com:<USERNAME>/<USERNAME>.github.io.git master

# 如果发布到 https://<USERNAME>.github.io/<REPO>
# git push -f git@github.com:<USERNAME>/<REPO>.git master:gh-pages
git push -f git@github.com:shencailing/vuepress-notes.git master:gh-pages

cd -
2
3
4
5
6
7
8
9
10
11
12
13
14
15
16
17
18
19
20
21
22
23
24
25
26
27
3.1部署 也可以手动将 项目
docs->.vuepress->dist下的内容 push到仓库中
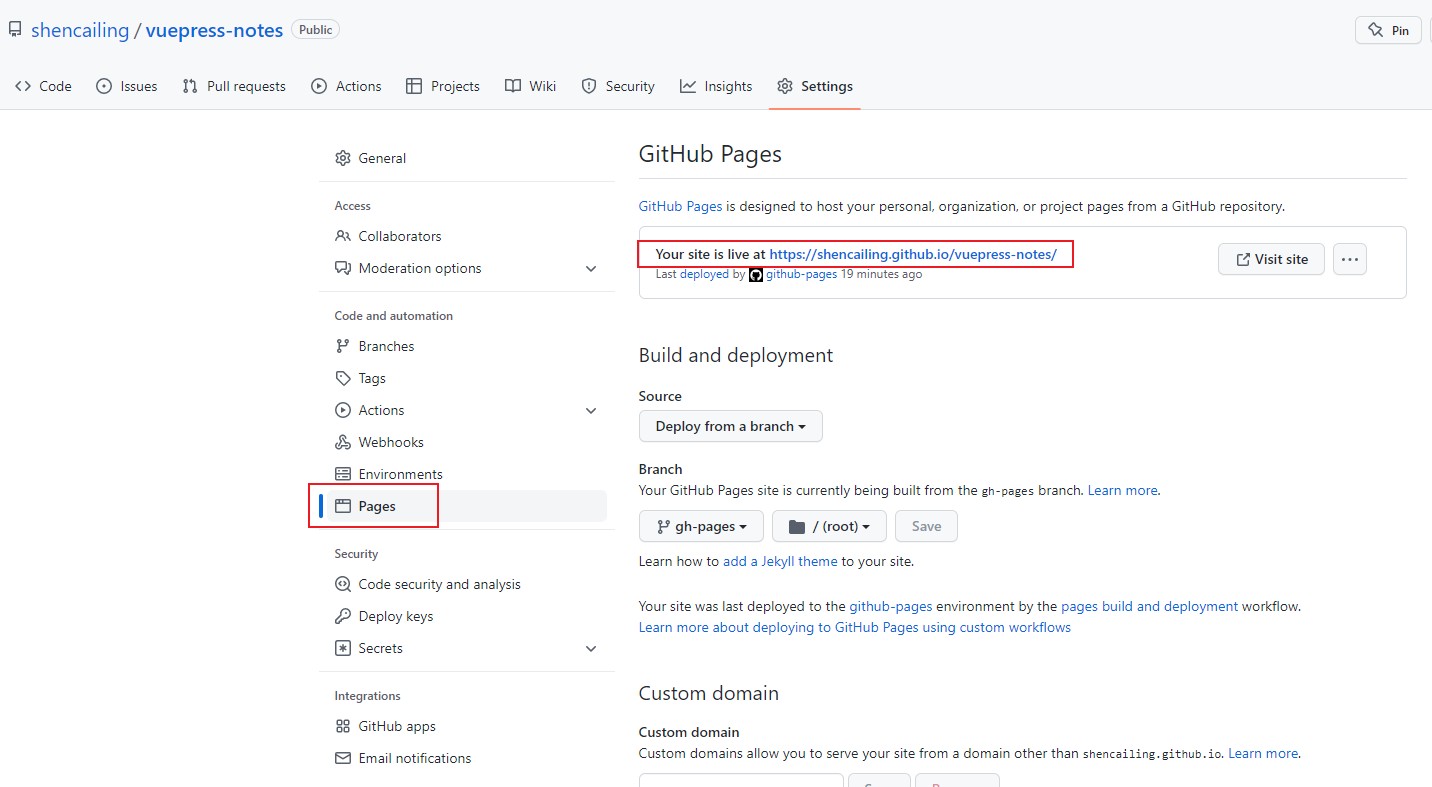
4 部署完成 可以访问 访问地址 (opens new window) 查看地址如下图
WARNING
- 项目需要 public 否则会影响github page 的使用
- 网络不是很稳定